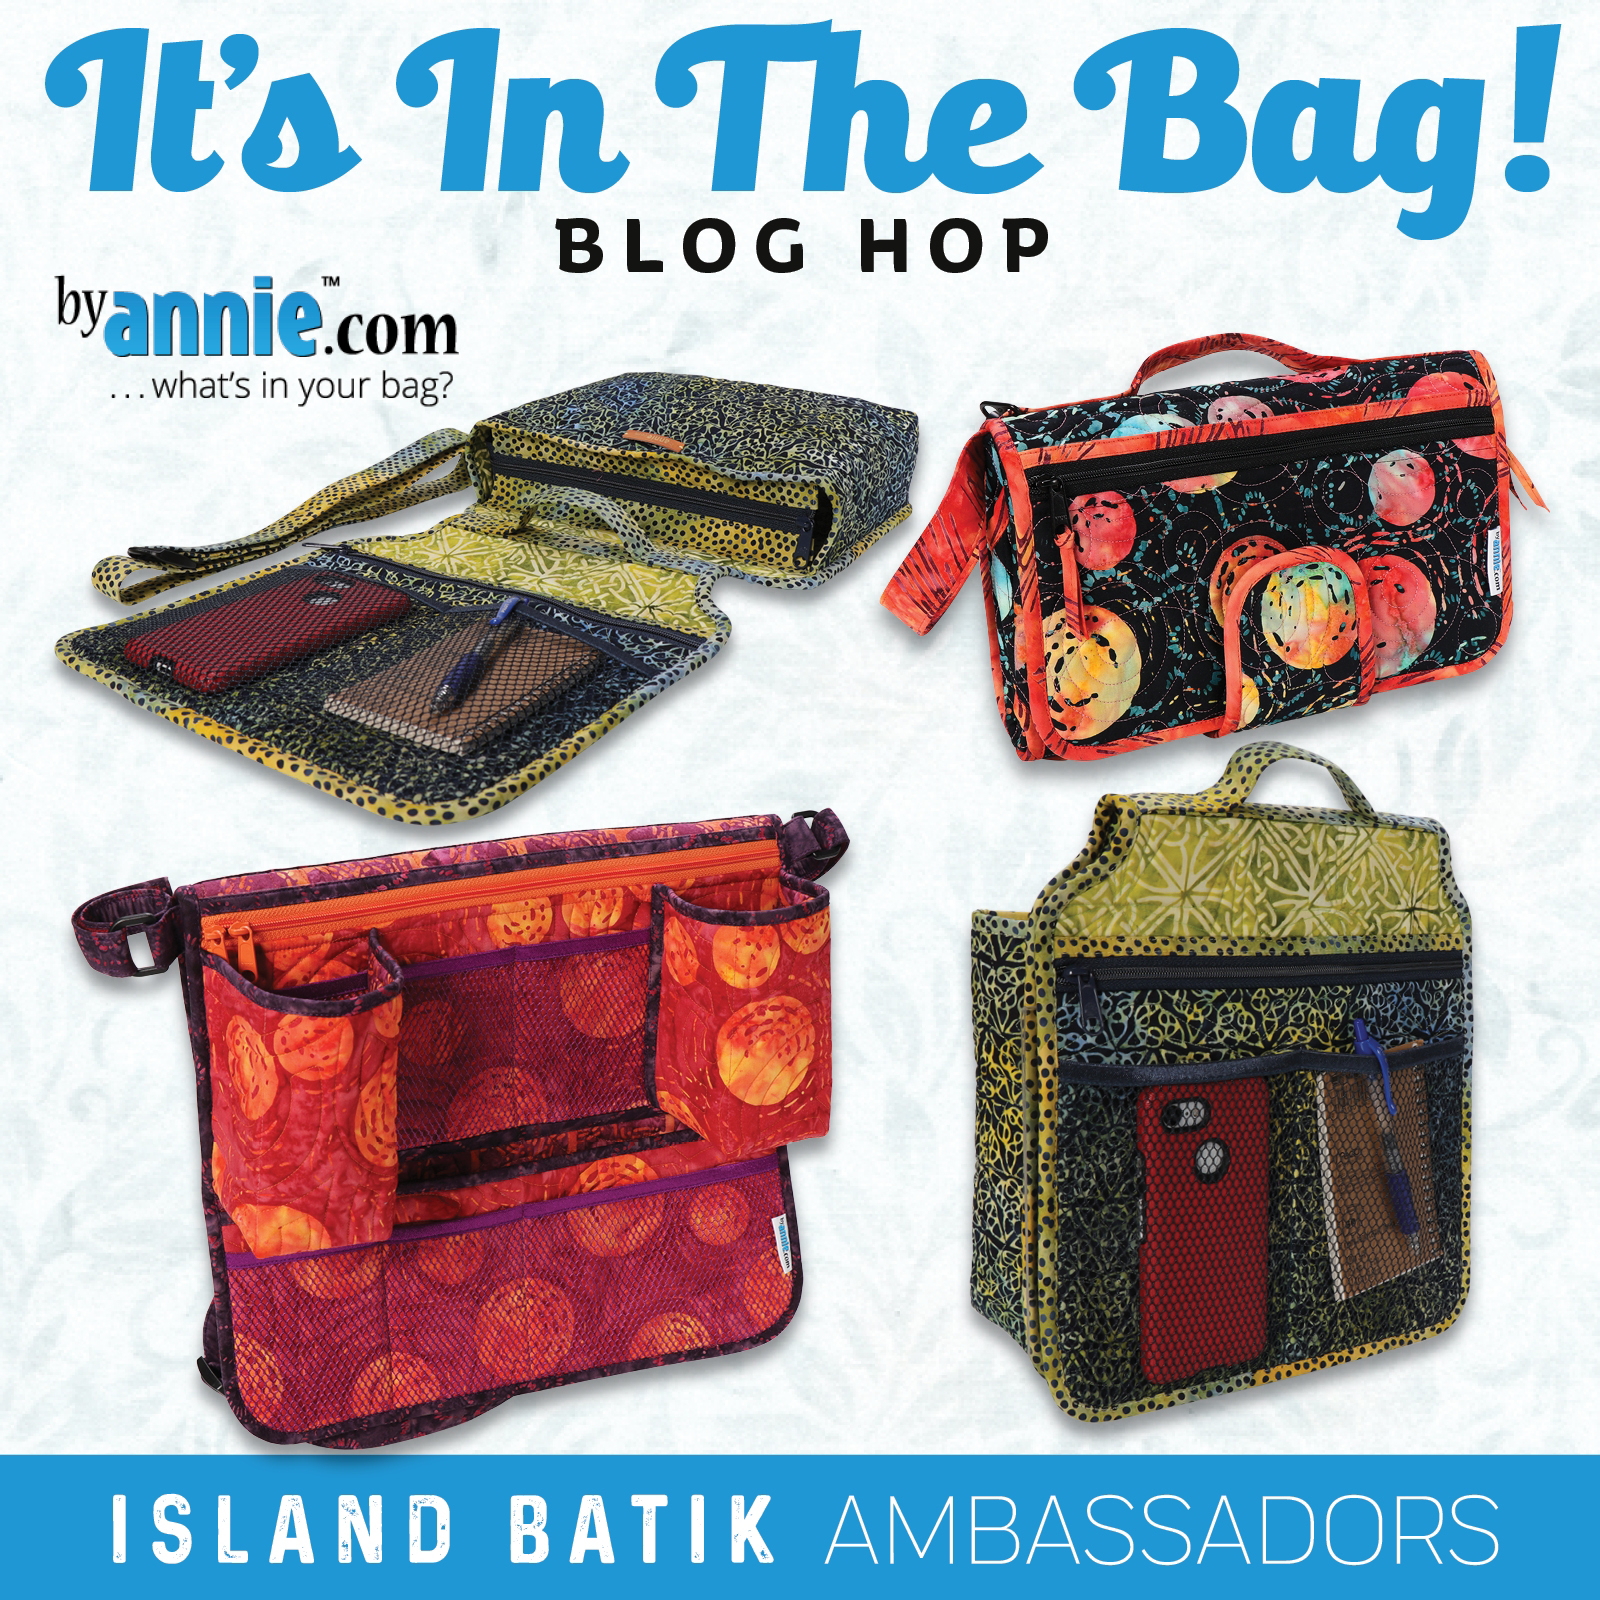
Island Batik Ambassador Program - It's In the Bag - ByAnnie Blog Hop
Get link
Facebook
X
Pinterest
Email
Other Apps
At last! The challenge I've been waiting for! This month is the ByAnnie Blog Hop, It's In the Bag!
I run the ByAnnie Bag Makers Group on Facebook, and back in January, I also started working for ByAnnie! So that's why this challenge was the most exciting for me.
I also had a bit of choice paralysis- so many great patterns to choose from! So I set up a poll in my Facebook group, and asked the members to vote. I already had a probable choice in the back of my mind, and then that same pattern is the one that won the vote. THEN, Annie herself voted and chose the same pattern as well. That sealed the deal- I would be making Divide and Conquer!
Divide and Conquer is a compartmented travel bag that is widely agreed upon to be the most difficult ByAnnie project. I had never made it before, so I was eager to give it a go.
Here is the description from the ByAnnie website:
"Organize it all in these versatile bags in two sizes with adjustable handles and full-width exterior pockets. An optional strap on back slips over handles on rolling luggage.
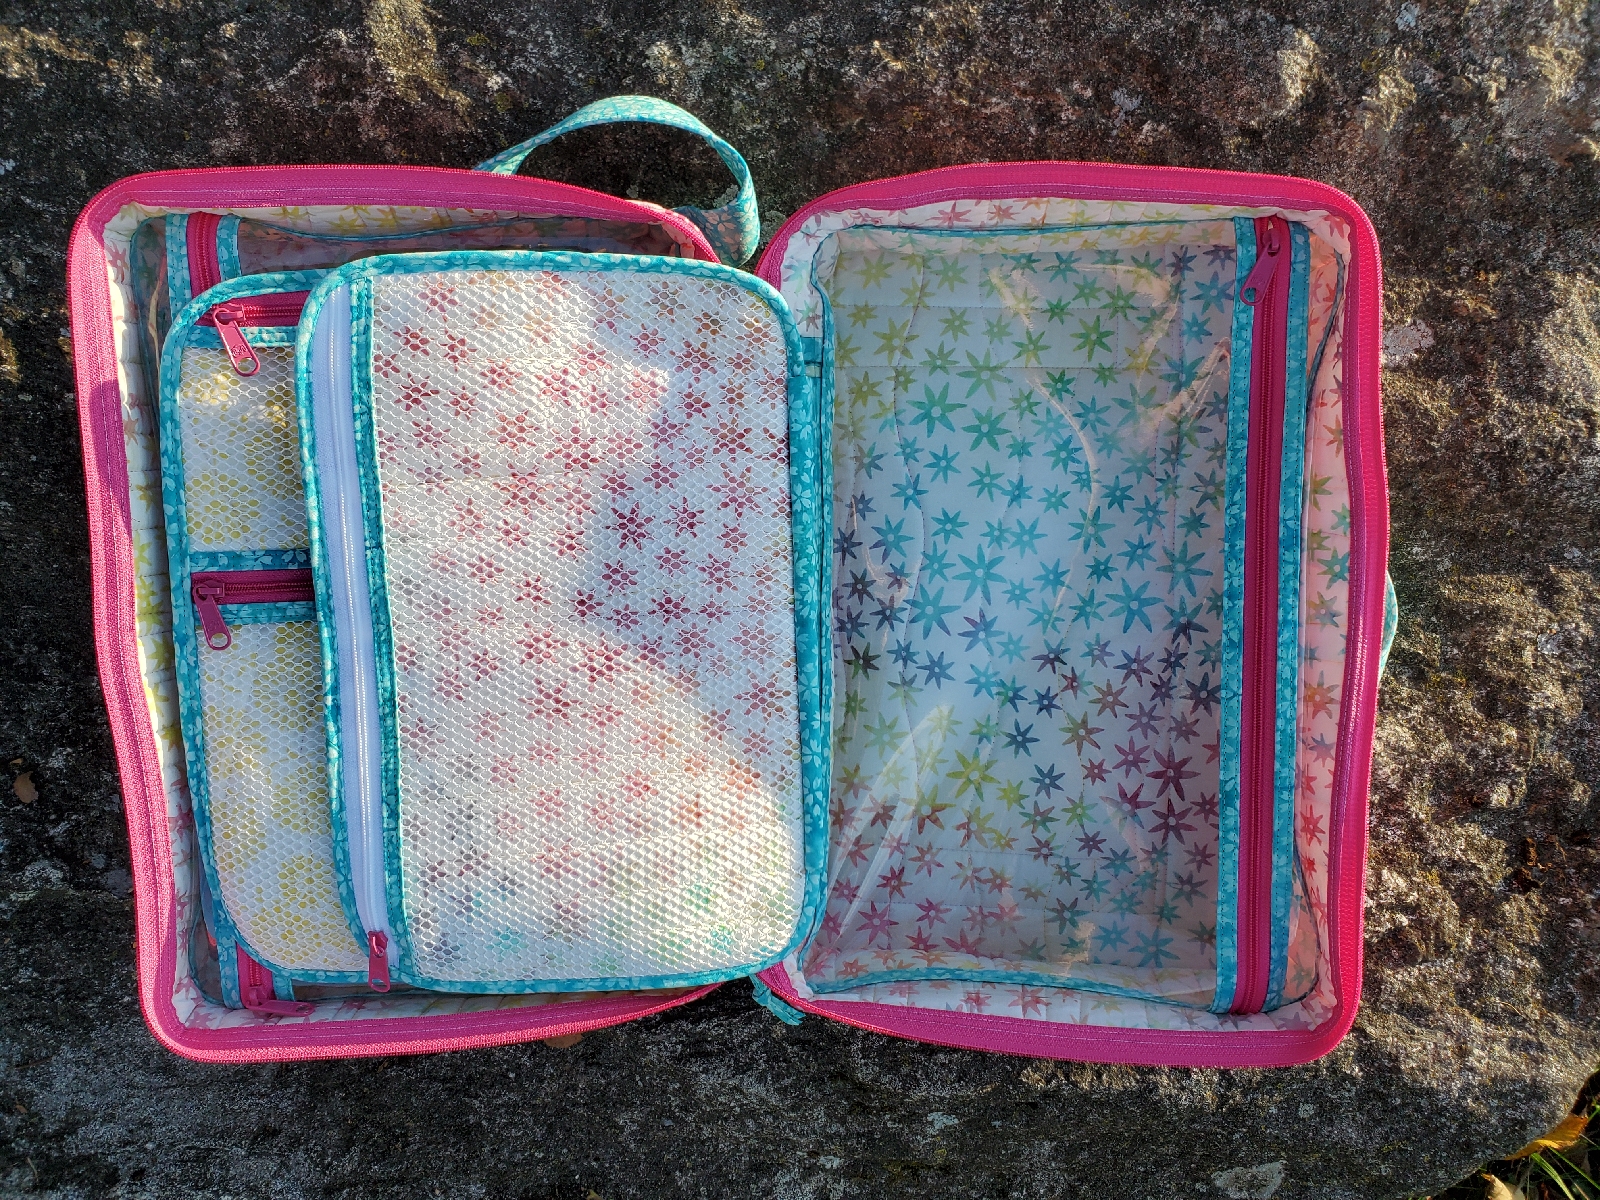
Bags open like suitcases to reveal handy see-through zippered compartments on each side. Attached pocket pages on the inside store and organize a multitude of smaller items."
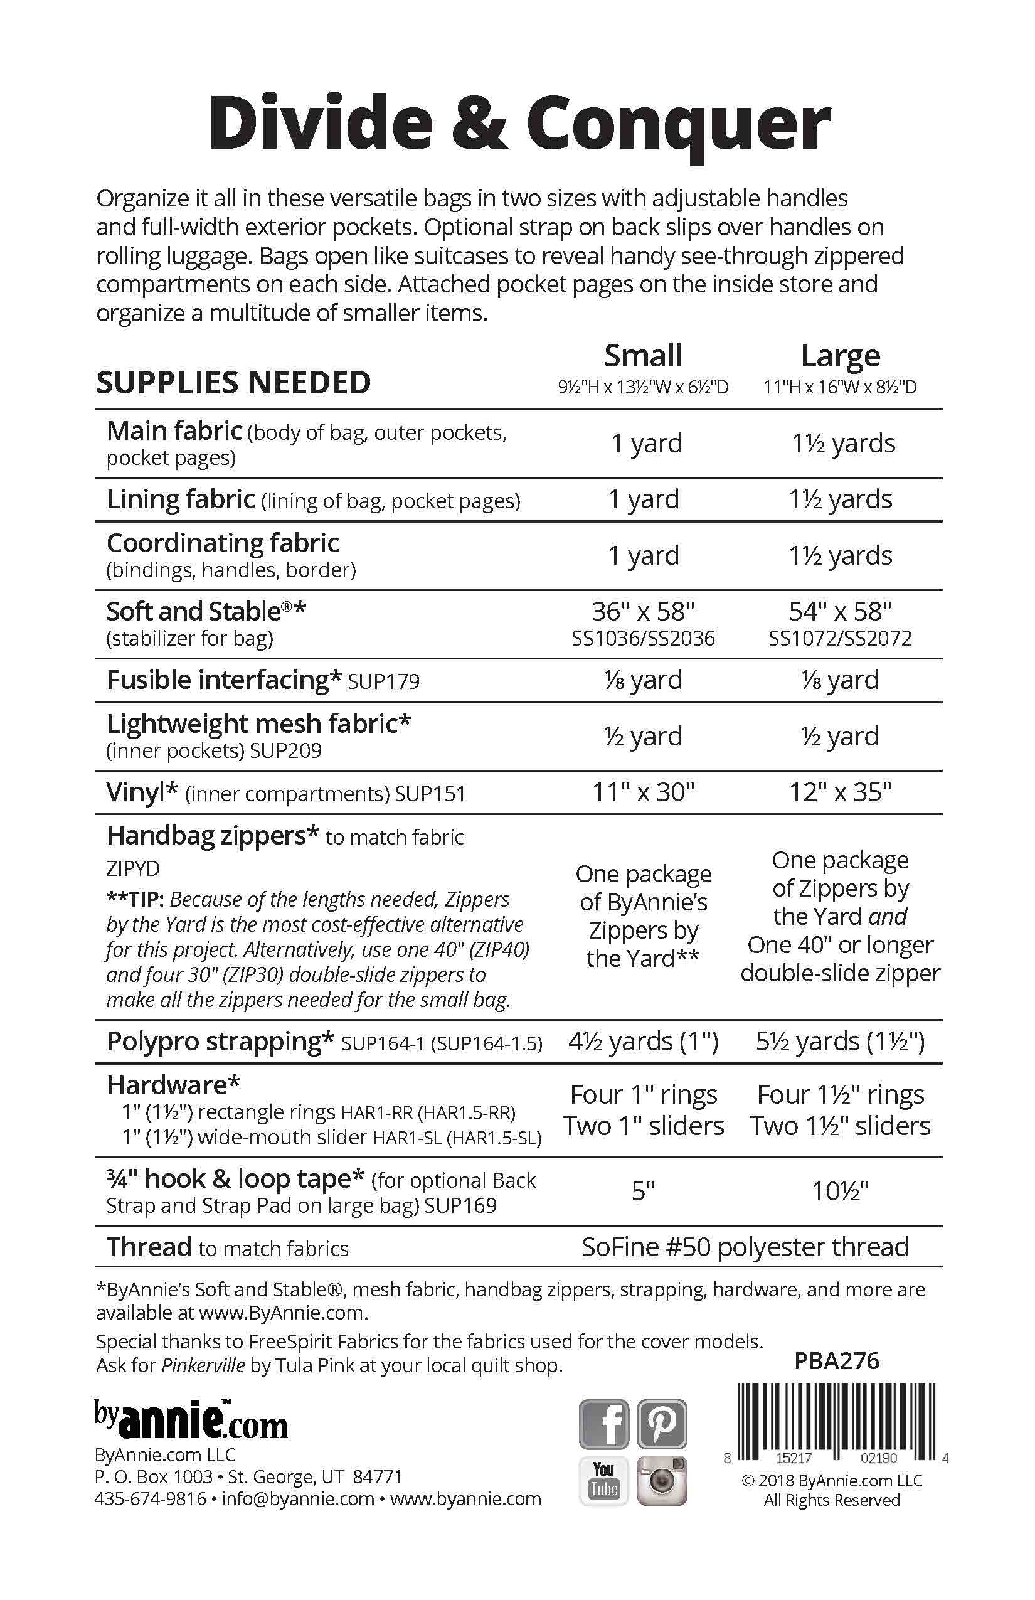
The pattern includes instructions for two sizes, and I chose the Large, which is 11"H x 16"W x 8.5"D.
If you would like to make your own Divide and Conquer, here is what you will need:
I had the pleasure of working with Vintage Charm by Kathy Engle. This fabric collection is bright, happy, and beautiful, but is admittedly pretty far out of my comfort zone. I usually go for bold and funky fabrics, rather than dainty florals, but I decided to do a few things to funky this project up a bit.
First, I added a fourth fabric. This pattern calls for 3 fabrics, but I wanted a wider, brighter range of colors. I used the fourth fabric to create a pieced border, which is not in the pattern. I used that same yellow to brighten up the inner pages, and used matching yellow zipper slides on the main outer zipper of the bag.
I also decided to add binding to all of the zippered pockets. I think this gives a more polished-looking finish, and also let me bring in some more color.
On the inner divider pages, I took inspiration from another ByAnnie pattern, A Place for Everything 2.0. So instead of having one large zipper pocket on each side of each page, I oriented some of the pockets horizontally, and put two on a side. This will allow me to more easily organize smaller items.
I didn't find this bag to be too terribly difficult. It is bulky and cumbersome, but I took my time and didn't have any problems. It is extremely well-designed, and the pattern is so detailed. If you just take it one step at a time, read carefully, and simply do what it says in the order it says, you'll wind up with a great outcome.
The Add-On Videos that are included with the pattern purchase are amazing. They give a detailed demonstration of any parts of the project that are unique or challenging. Here is what they include:
- Overview and Terminology
- Make Handle Units
- Prepare Zippers
- Assemble Bag Front and Back
- Prepare Vinyl Compartments
- Prepare Inner Pocket Pages
- Prepare Zipper Strip Loop
- Assemble the Bag
All of that being said, I do not recommend this bag as a first project. If you are new to bag making and/or new to ByAnnie patterns, there are four, free PDF patterns with free video tutorials that are designed specifically for you. These projects are the perfect way to familiarize yourself with ByAnnie techniques and terminology, and will set you up for success with all of your future bag making adventures. You can find the ByAnnie Basics here: http://www.byannie.com/byannie-basics
Another great way to get into ByAnnie patterns is by joining my Facebook group. We have over 35,000 makers in over 90 countries! It's a fun, positive, inspiring group where people love to post photos of their latest project. You can ask questions and there is pretty much always someone online to answer right away. It's awesome! Join us here: http://www.facebook.com/groups/byanniebagmakers
Last but certainly not least, here are some photos of my Divide and Conquer:
Please be sure to visit all of the Island Batik Ambassadors to see their ByAnnie projects. I have been blown away by their projects, especially considering that a lot of the ambassadors had little to no experience with bag making! Their ability to just dive right in and get it done is impressive.
Great job on making the bag. I love how roomy it is and all that space to put things.It is so beautiful and the fabrics are gorgeous. They are my favorite so far.
*Products provided by sponsors* The final challenge of the year is called Celebration. The Island Batik Ambassadors were given the challenge to make any project that represents a holiday. While it was tempting to choose Christmas, I decided to go down a different route. Recently, we lost my husband's grandpa, or Taid Fawr, as he was known in our family. Taid Fawr (say "tide VOW-er") means "Great-Grandpa" in Welsh. Taid Fawr with my younger daughter, who bears a striking resemblance to him Somehow, even though he was 99 years and 2 days old, it seemed too soon for him to go. He was an awesome guy, and one of those people who friends and family wish could live forever. Taid Fawr speaking at our wedding in 2013 Having just lost Nain Fawr (Great Grandma- say "nine VOW-er") not too long ago, it was especially difficult for all who loved them. They were married for 77 years! Taid Fawr and Nain Fawr holding my...
For this month, our challenge was to use a technique that is near and dear to my heart: paper piecing. We were allowed to use foundation paper piecing or English paper piecing, and I chose foundation paper piecing. This month I was lucky enough to work with Ornate Gems by Kathy Engle. I'll be honest- I had a heck of a time settling on a pattern for this challenge. I love foundation paper piecing so much, and the choices are so endless! I was a bit overwhelmed and actually had a few false starts before I finally settled on using the Mini Series patterns by Alison Glass and Giucy Giuce- but with a twist. I enlarged the blocks to better show off the beautiful fabric. So my blocks for this project were 7.5" rather than the 4" blocks I used for the Mini Series Sew Along. And then, disaster struck. While opening a jar of salsa, I felt a POP in my wrist and hand, and was almost knocked over by the pain. After lots of bad words and a visit wi...

 I had the pleasure of working with Vintage Charm by Kathy Engle. This fabric collection is bright, happy, and beautiful, but is admittedly pretty far out of my comfort zone. I usually go for bold and funky fabrics, rather than dainty florals, but I decided to do a few things to funky this project up a bit.


Nice bag to organize everything.
ReplyDeleteGreat job on making the bag. I love how roomy it is and all that space to put things.It is so beautiful and the fabrics are gorgeous. They are my favorite so far.
ReplyDeleteReally pretty!
ReplyDelete